


So you want to run attended or unattended RPA flows but don’t want to keep your PC on 24/7? Use a Virtual Machine (VM)! In this blog post I’ll show you how to spin up an Azure VM, run your Desktop Flow and close the VM down to save costs and run efficient Desktop Flows.
Why?
Why would we use an Azure VM to run our Desktop Flows? Well, it’s easy and cost efficient. If you’re at a company that doesn’t have local servers that are on 24/7 with space for a UI Flow VM instance or you’ve moved to the cloud, then this will save you money, headaches and time. You will spin the azure VM instance up, perform your UI Flow tasks and then turn it off again all from a Flow run. You can then run your Flows during the night when you’re asleep, and as an example, if you’re pulling information from an invoice, you can do this during the night and mail yourself the results ready for you in the morning.
Azure VM Creation
Firstly, lets create the Azure VM. I’ve used a Standard B1ms (1 vcpus, 2 GiB memory) for running Web Desktop Flows as it’s the lowest spec that works efficiently with Chrome. You will obviously need to select a specification to your Windows application if you’re running a Windows based UI Flow. It will also need to be a Windows operating system. You can find more about the prices at: https://azure.microsoft.com/en-us/pricing/details/virtual-machines/windows/
If you haven’t set up a VM before, you need to be logged into the Azure Portal (click here). Below is a step by step guide to get an Azure VM set up:
- Once you’re on the Azure Portal, select ‘Virtual Machines’
- Click ‘Add’
- Select your Subscription
- Select your Resource Group (If you haven’t created one, create one and call it ‘UI Flows’
- Enter your Virtual Machine Name (I use UIFlowRunner)
- Select your Region
- Select Image as ‘Windows 10 Pro’
- Set your Admin Username/Password
- Set Inbound Ports to 3389
- Select Next
- Select your disk type (costs change here) but it’s entirely up to you
- Select Next
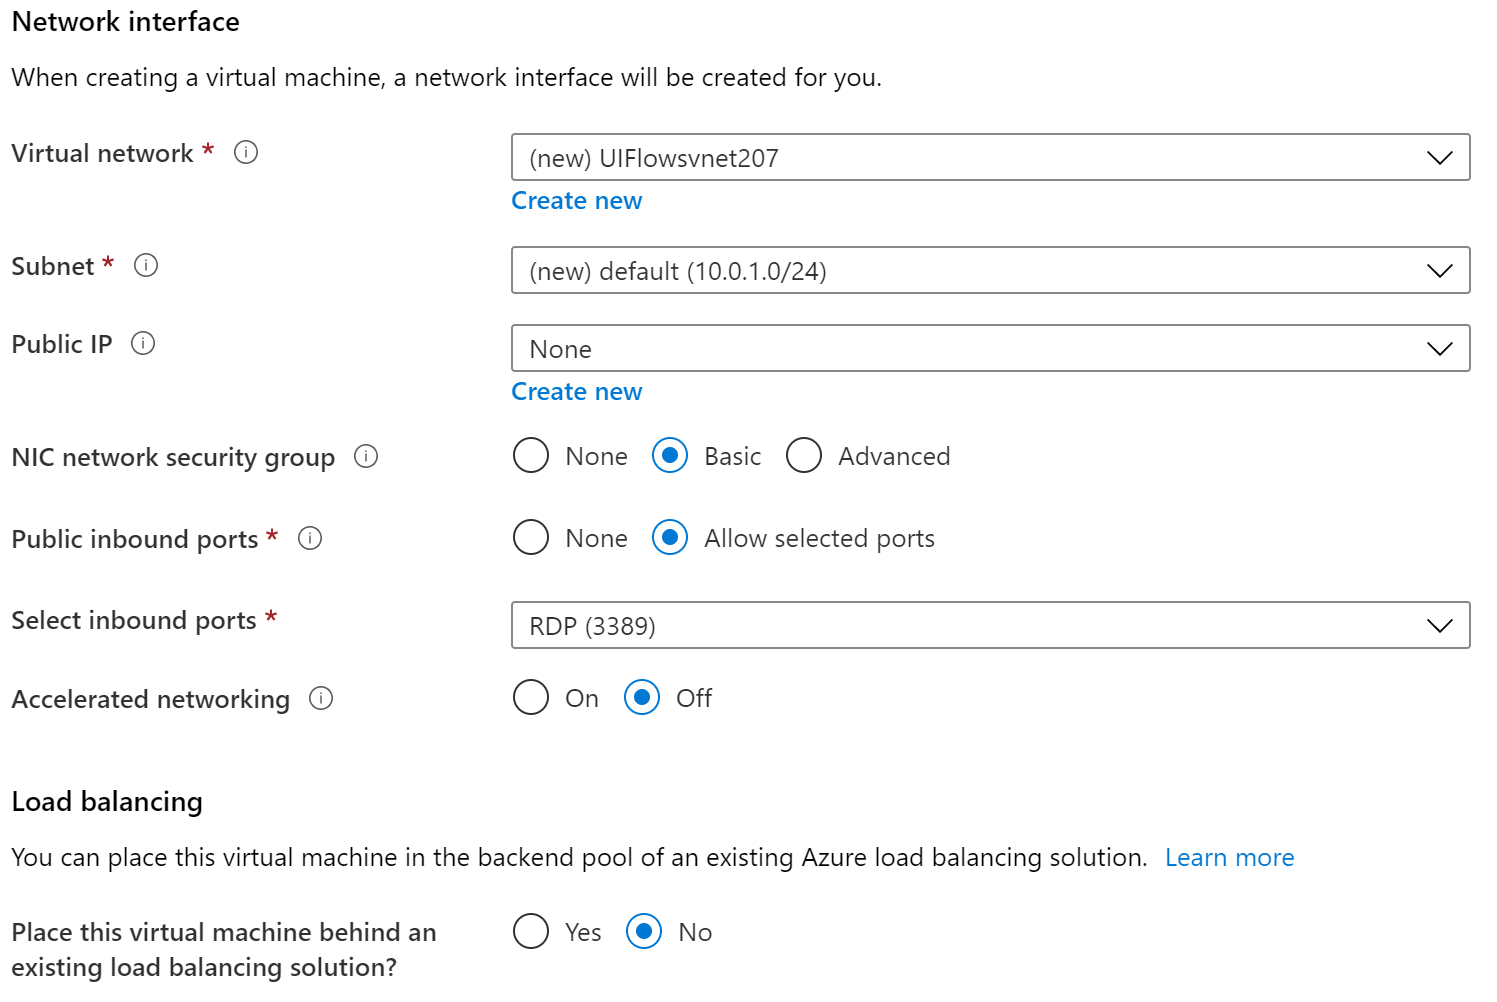
- Here you have to add your network details (check the image below)
- Click Next until you hit the ‘Review tab’ (3 clicks)
- Review your VM and create it
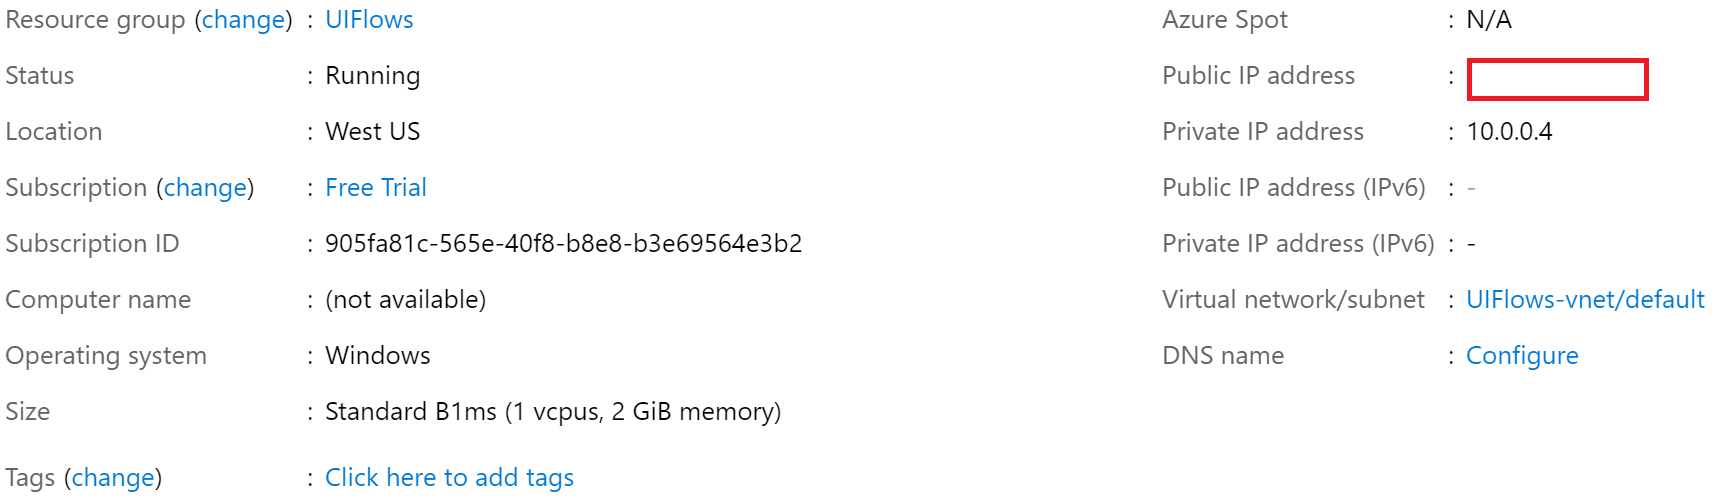
Now we have an Azure VM created we want to turn it on. Go back to home and re-select ‘Virtual Machines’. You can now see your newly created VM. Select the VM and hit ‘Start’. Your VM should look like the image below:
Azure VM Power Automate Connection
Now we have our VM running we need to establish a remote desktop connection to the VM. Your IP address for your VM should be where the red box is shown on the image above, copy this and open the remote desktop application on your PC. Enter the IP address and the Admin username/password you used when creating the VM.
You can then install Chrome (or Chromium Edge), the Gateway and the browser plugin to allow Selenium to run. If you need information about the gateway/plugin check click here.
Once this is done you now have a UI Flow Runner. Stop your VM.
Enabling Power Automate to Control Azure VM’s
To allow Power Automate to control Azure VM’s we need to have an Automation Account created. Follow the step-by-step guide below on the creation of this:
- On the Azure Portal click ‘Automation Accounts’
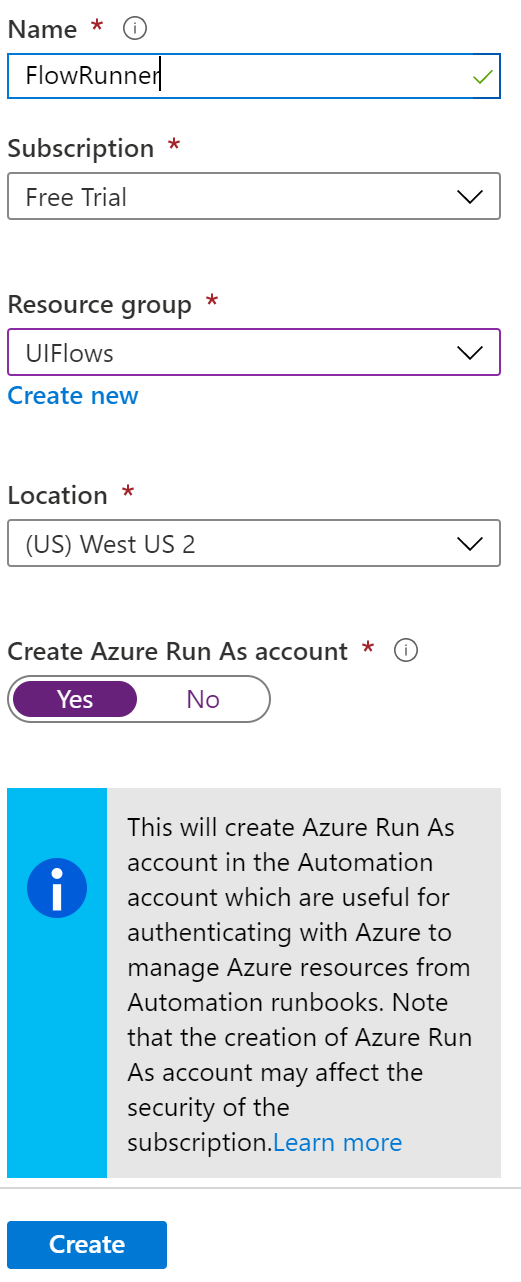
- Enter the Automation Account name (I use FlowRunner)
- Select the Resource Group (the same group as you created for your VM)
- Select the Location (the same as you used for your VM)
- Make sure ‘Create Azure Run As account’ is set to yes
- Click ‘Create’
- Now you’re on the ‘Automation Accounts’ page, open your newly created Automation Account
- Under the ‘Process Automation’ subheading select ‘Runbooks’
- Click ‘Browse Gallery’
- Select ‘Start Azure V2 VMs‘
- Click ‘Import’
- Repeat steps 8 – 11 and select ‘Stop Azure V2 VMs‘
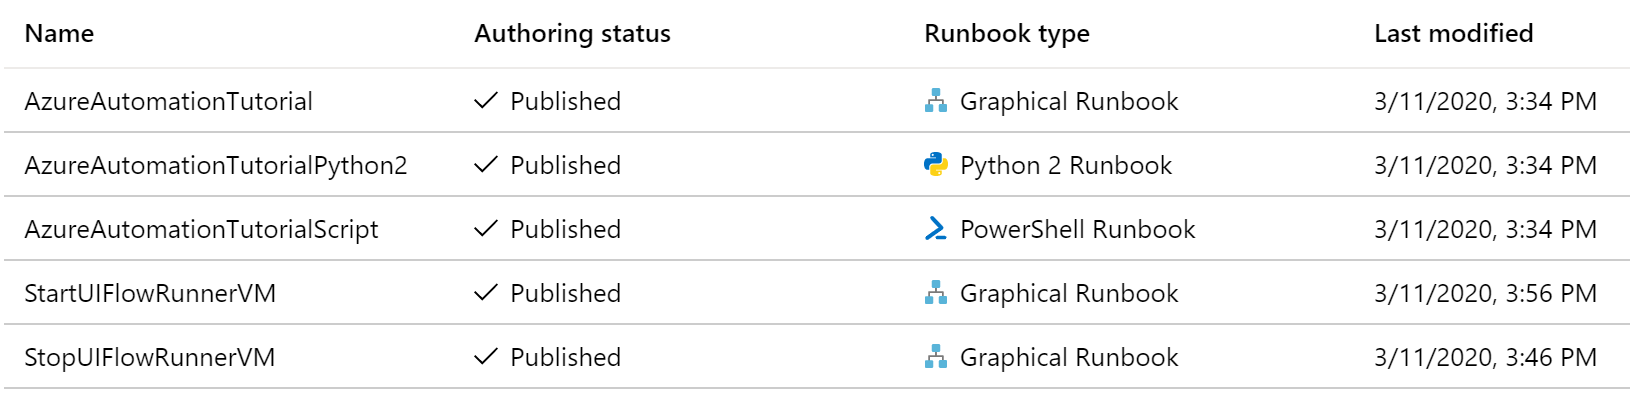
We now have an account that can stop and start Azure VM’s within our UIFlow resource group. It should look similar to the image below:
Controlling Azure VM’s from a Flow
Now we need to add the action ‘Azure Create Job’ twice. One for turning the VM on and one for turning the VM off. Everything else in your flow will be sandwiched between these two actions(if you want to get more complex you can look at added a finally section to make sure your VM is turned off in the even of a flow failing).
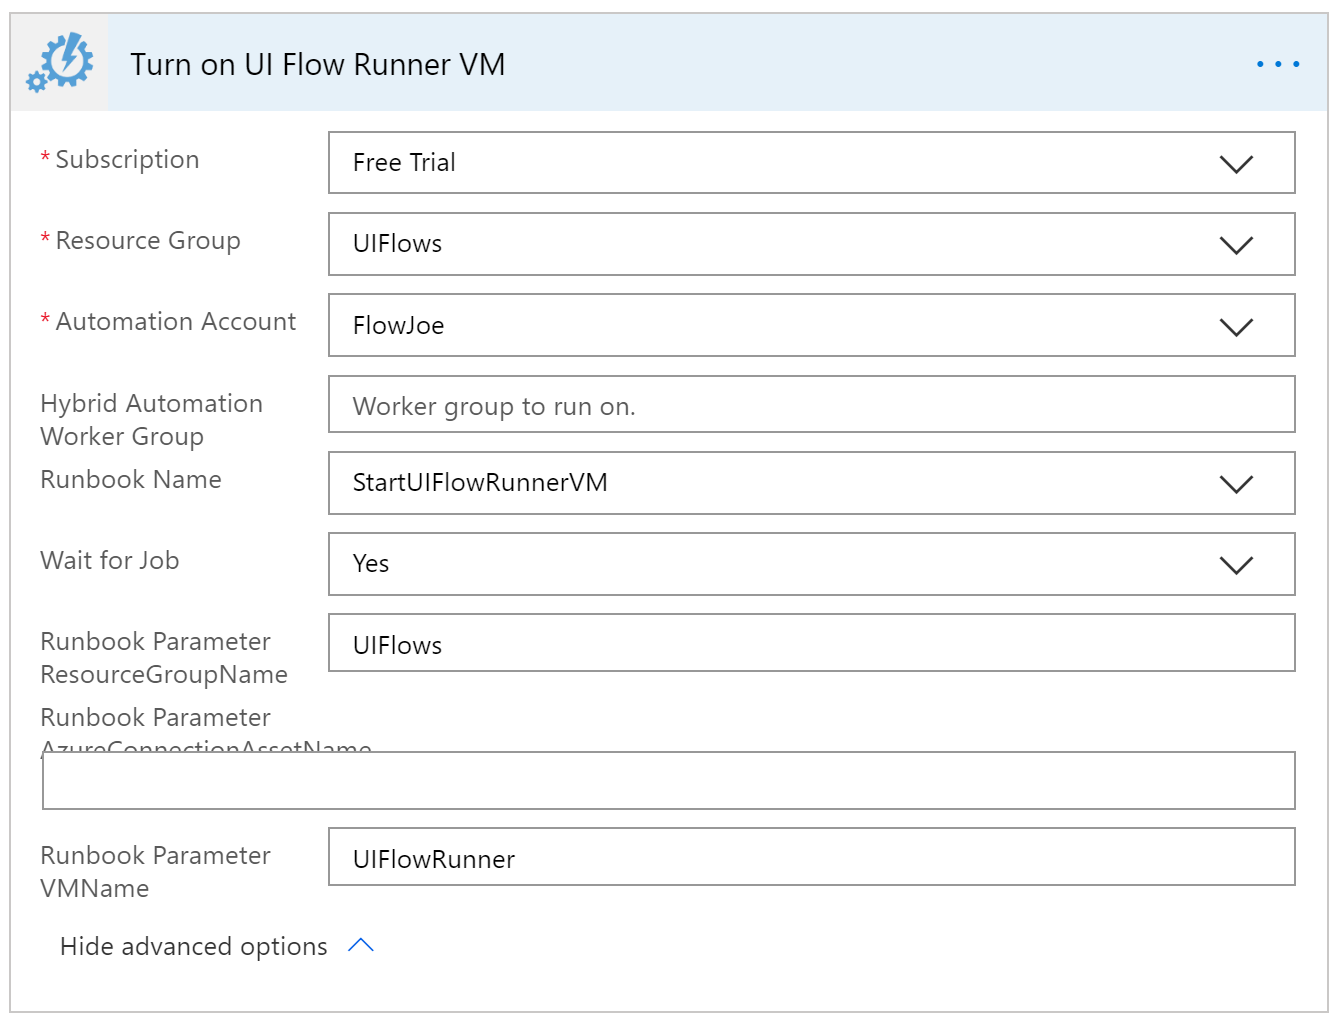
The first Azure Create Job action should use the automation account we created and select the Runbook we added (I’ve modified mine slightly which is why it’s called StartUIFlowRunnerVM) and your action should look like this:
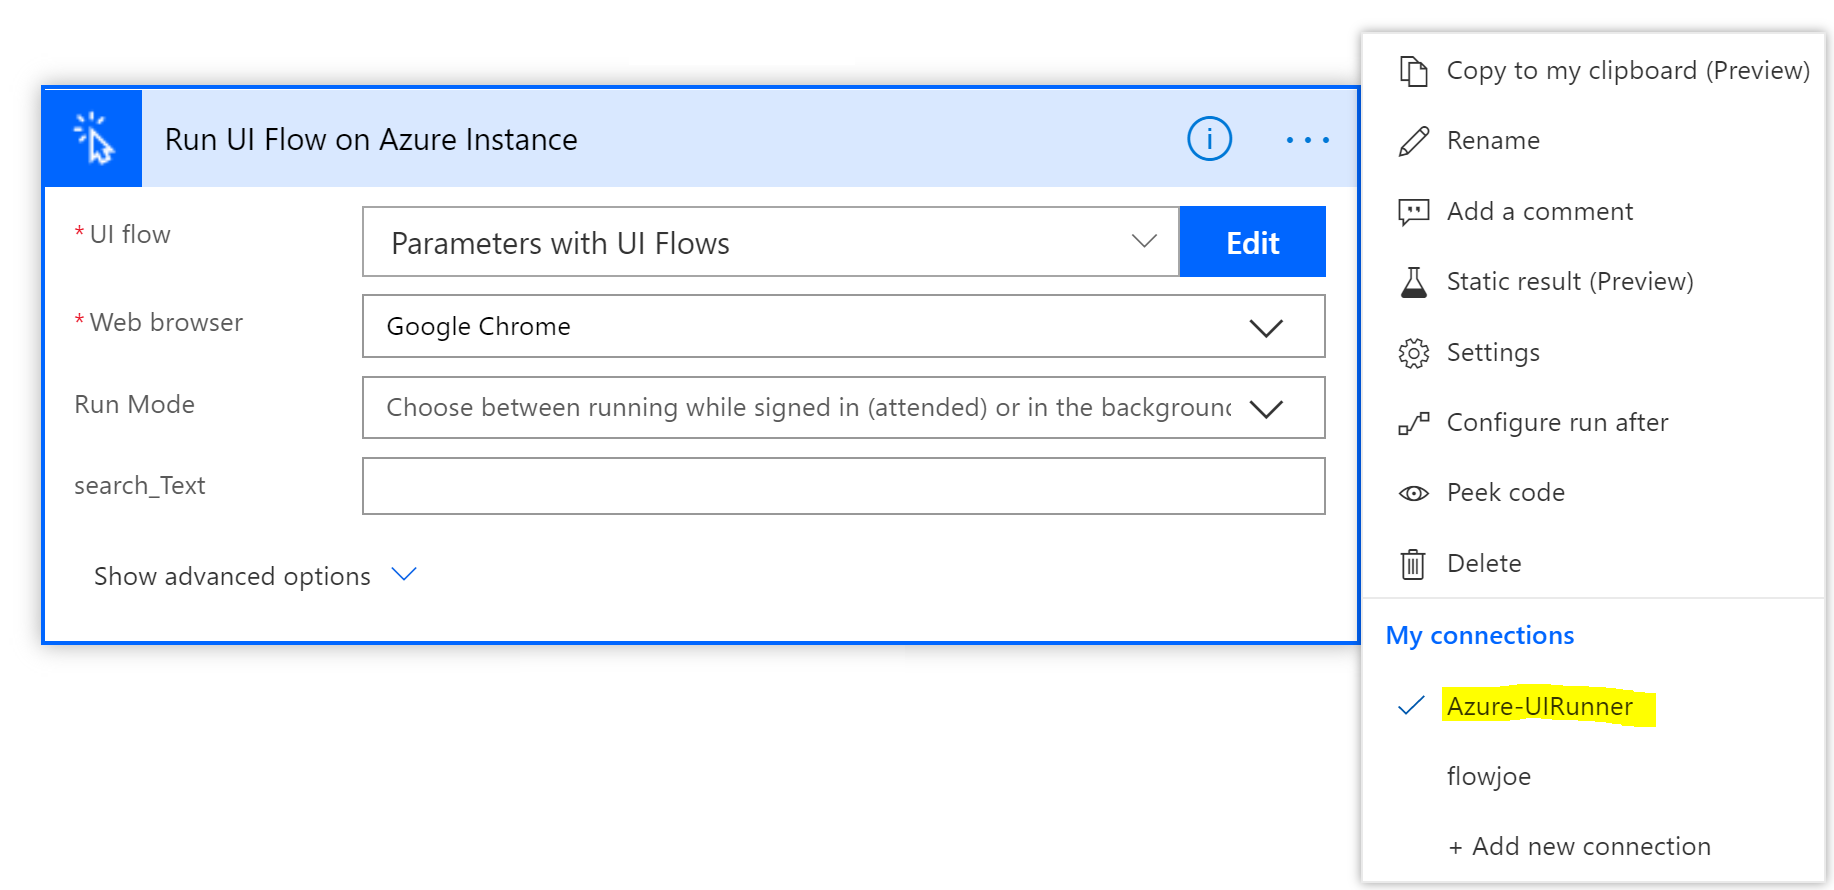
Then you want to call your UI flow and make sure you’re selecting the correct gateway account which can be seen below:
Finally, you want to use the second Azure Create Job action to shut down the VM. The setup is similar to the startup except you will change the Runbook to the shutdown version or, in my case (as I have modified the runbook), StopUIFlowRunnerVM. You can see this below:

You now have a fully automated UI Flow run with a VM set up to run all of your UI Flows.