


If you’re like me and you now shop online more than you do in stores, ordering at just a click of a button and tracking your overall expenditure is constantly becoming harder. You can of course view each order on your account, but you do not get an overall view of your spend.
This blog post aims to scrape an incoming email to get the order total from an Amazon order, take that amount and store it, updating the overall spend every time a new email arrives.
We will look briefly at a CDS entity to store the information, pull the current value (as this will be run every time there is an email and we want to increase the monthly spend) and then add the newly scraped spend. This is the first stage of this idea and will be developed overtime to include monthly spend, notifications and reporting.

Workflow

Above is an image of the workflow we will be using to make this Flow possible. There are 5 steps in this workflow listed below:
- We have flow check our outlook emails
- When an email comes in and is from auto-confirm@amazon.co.uk, we convert the html to text.
- We then grab the current months spend from the CDS
- We now have the email information as text and the current months spend, we scrape the order total information and add it to the current months spend
- We update the CDS month with the current spend
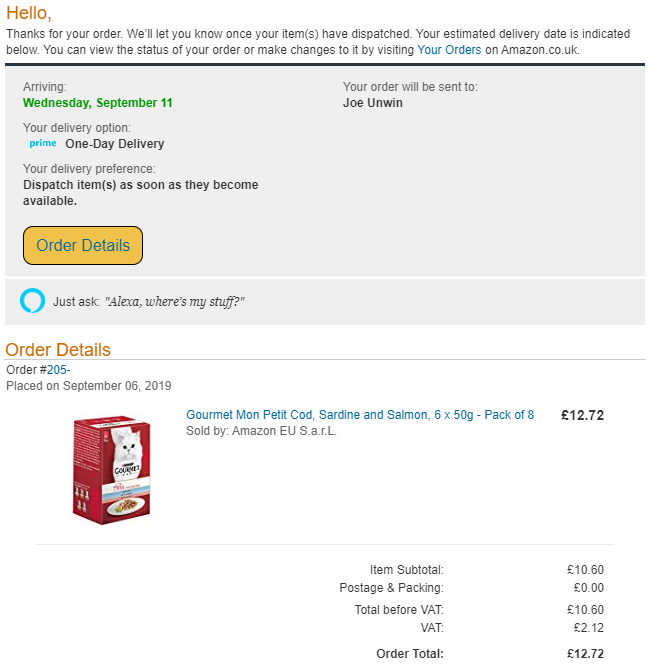
Email Example
The email that will be used as the email during this blog post is one of my order for cat food! This has a total amount of £12.72 which we will expect the CDS overall spend to be incremented to from 0.
Building the Flow
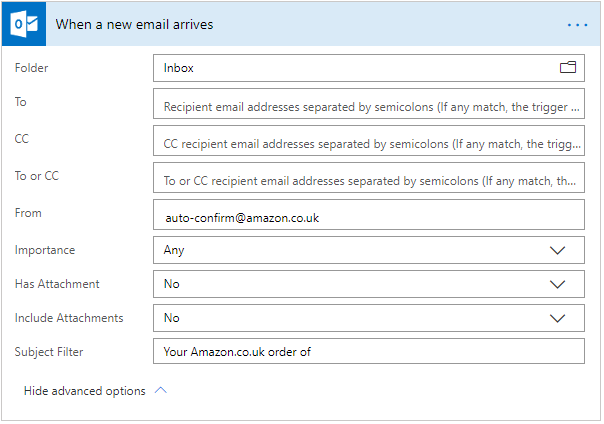
Trigger
Firstly, we start by added the trigger ‘When a New Email Arrives’ for Outlook. This, by default, will only display the folder option and will be selecting ‘Inbox’. We want to expand the ‘Advanced Options’ and enter the amazon email into the ‘From’ field, as I’m based in the UK the amazon email is ‘auto-confirm@amazon.co.uk’, if you’re following this and live outside of the UK you will need to change this to your local amazon confirmation email. We then also want to add the subject headline ‘Your Amazon.co.uk order of’ so that we can ensure we just target order emails (See the image below).
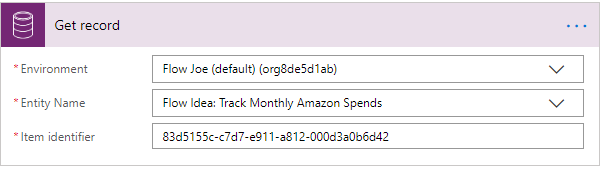
CDS – Get Information Stored
Now we have the email, we also want to get the current information stored. If you’re unfamiliar with CDS, check back at a later date for an introduction to CDS blog post I’m working on, but for now, I’ve added an entity and I have a simple text field of ‘Overall Spend’. I’m also hard coding the ‘Item Identifier’ with the GUID.
Compose – Convert String to Float
We now want to convert the returned string that is stored on the CDS (The Overall Spend) to a float, so that we can use the number to add to the new order total.
To do this we use the Compose action then using the Float expression, we pass the ‘Overall Spend’ from the ‘Get Record’ action.
float(body('Get_record')?['cr069_overallspend'])

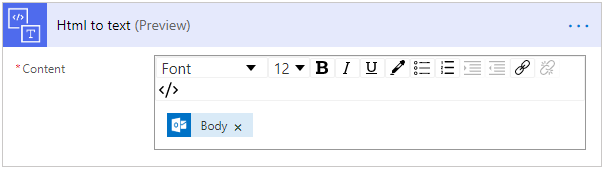
HTML to Text – Convert Email HTML to Text
Now we have the overall spend and we also have the email, we need to convert the HTML from the email to text so that we can extract the ‘Order Total’ to be used.
To do this we simply add the action ‘Html to text’ and pass the body of the email.
Condition – Check if the Email is not Empty
Now we have the email converted from HTML to Text, we want to run a condition. This is to stop us here if the email simply contains no information. If the email is ‘null’ then we want to stop the flow as there is no point continuing if we have no information, so we simply leave the ‘No’ condition to be empty.
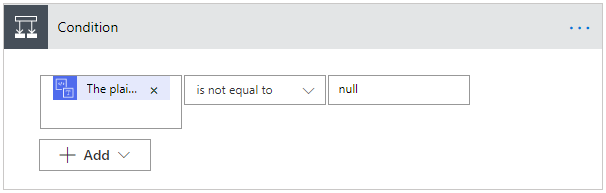
If the text does have content, then we want to run another compose.
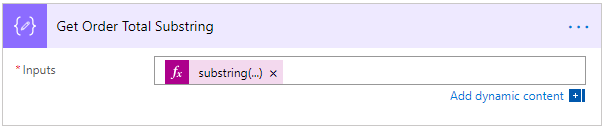
Compose – Get Order Total from Email Text
Now we want to scrape the order total from the email, so how do we do this? We can utilise the sub-string expression here, to scrape the text we want from the converted HTML to Text that we have previously done.
substring(body('Html_to_text'),add(lastIndexOf(body('Html_to_text'),'Order Total: £'), 14),5)
The code above shows how this can be done. We pass the HTML to Text body, the start character and the end character. Now in the example above, we know the email always states ‘Order Total: £’, so we pass this in and the sub-string function finds this for us, however, we do not want that information, we just want the numerical value after it. So we enter ’14’ as the second parameter, as there are 14 characters between ‘O and £’, this means that we start the sub=string at the character after ‘£’. We then pass ‘5’ as we then can take any value after ‘£’ for up to 99.99.
This means at this time we’re only supporting values of up to £99.99. We can increase this to 6 and trim the space off if there is less but for this example we’re sticking with 99.99.
This then returns us a string of the order total.
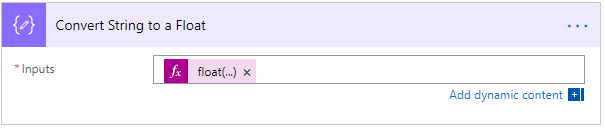
Compose – Convert Order Total from String to Float
As previously stated, we want to add our order total to our overall spend, so we need to convert our string to a decimal number to do this. Therefore, we need to use compose again to convert the order total to a float.
We pass the output from the ‘Get Order Total Substring’ that we have just written into the float expression (shown below).
float(outputs('Get_Order_Total_Substring'))
Compose – Add Order Total to Overall Spend
Now we have two numerical values, the current overall spend and also the new order total that has just been placed, we can add them together to get the new overall amount with the add expression.
We simply pass the overall spend and the order total into the expression as two parameters (shown below).
add(outputs('Convert_Overall_Spend_from_String_to_Float'), outputs('Convert_String_to_a_Float'))

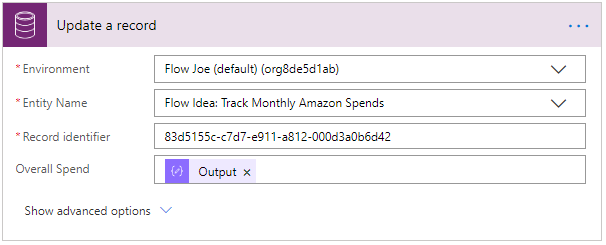
CDS – Update Overall Spend Record
Now we have scraped the information, retrieved the overall spend and added everything together we just need to update our overall spend! To do this we use the CDS action ‘Update Record’. This is basically doing the opposite of ‘Get Record’, we’re sending information to the record rather than retrieving it.
Again, I’m hard coding the GUID as we did before, but this tim I’m passing the output from ‘Add Order Total To Overall Spend’ to the ‘Overall Spend’ field as shown below.
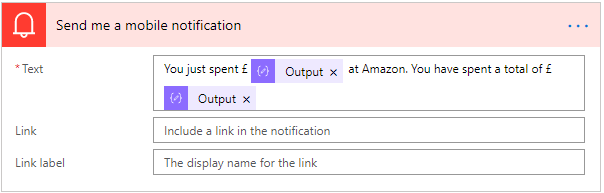
Notification
Now we can simply add a mobile notification to pass the total money that has been spent and also the order total you have just spent (shown below).
Demonstration
