
This blog and video series ‘Understanding The Trigger’ (UTT) is looking at each trigger in the Microsoft Flow workspace. The aim is to understand what they do, how to use them and building an example of them being used to allow us to have a greater understanding of the breadth of uses for Microsoft Flow!

The Trigger
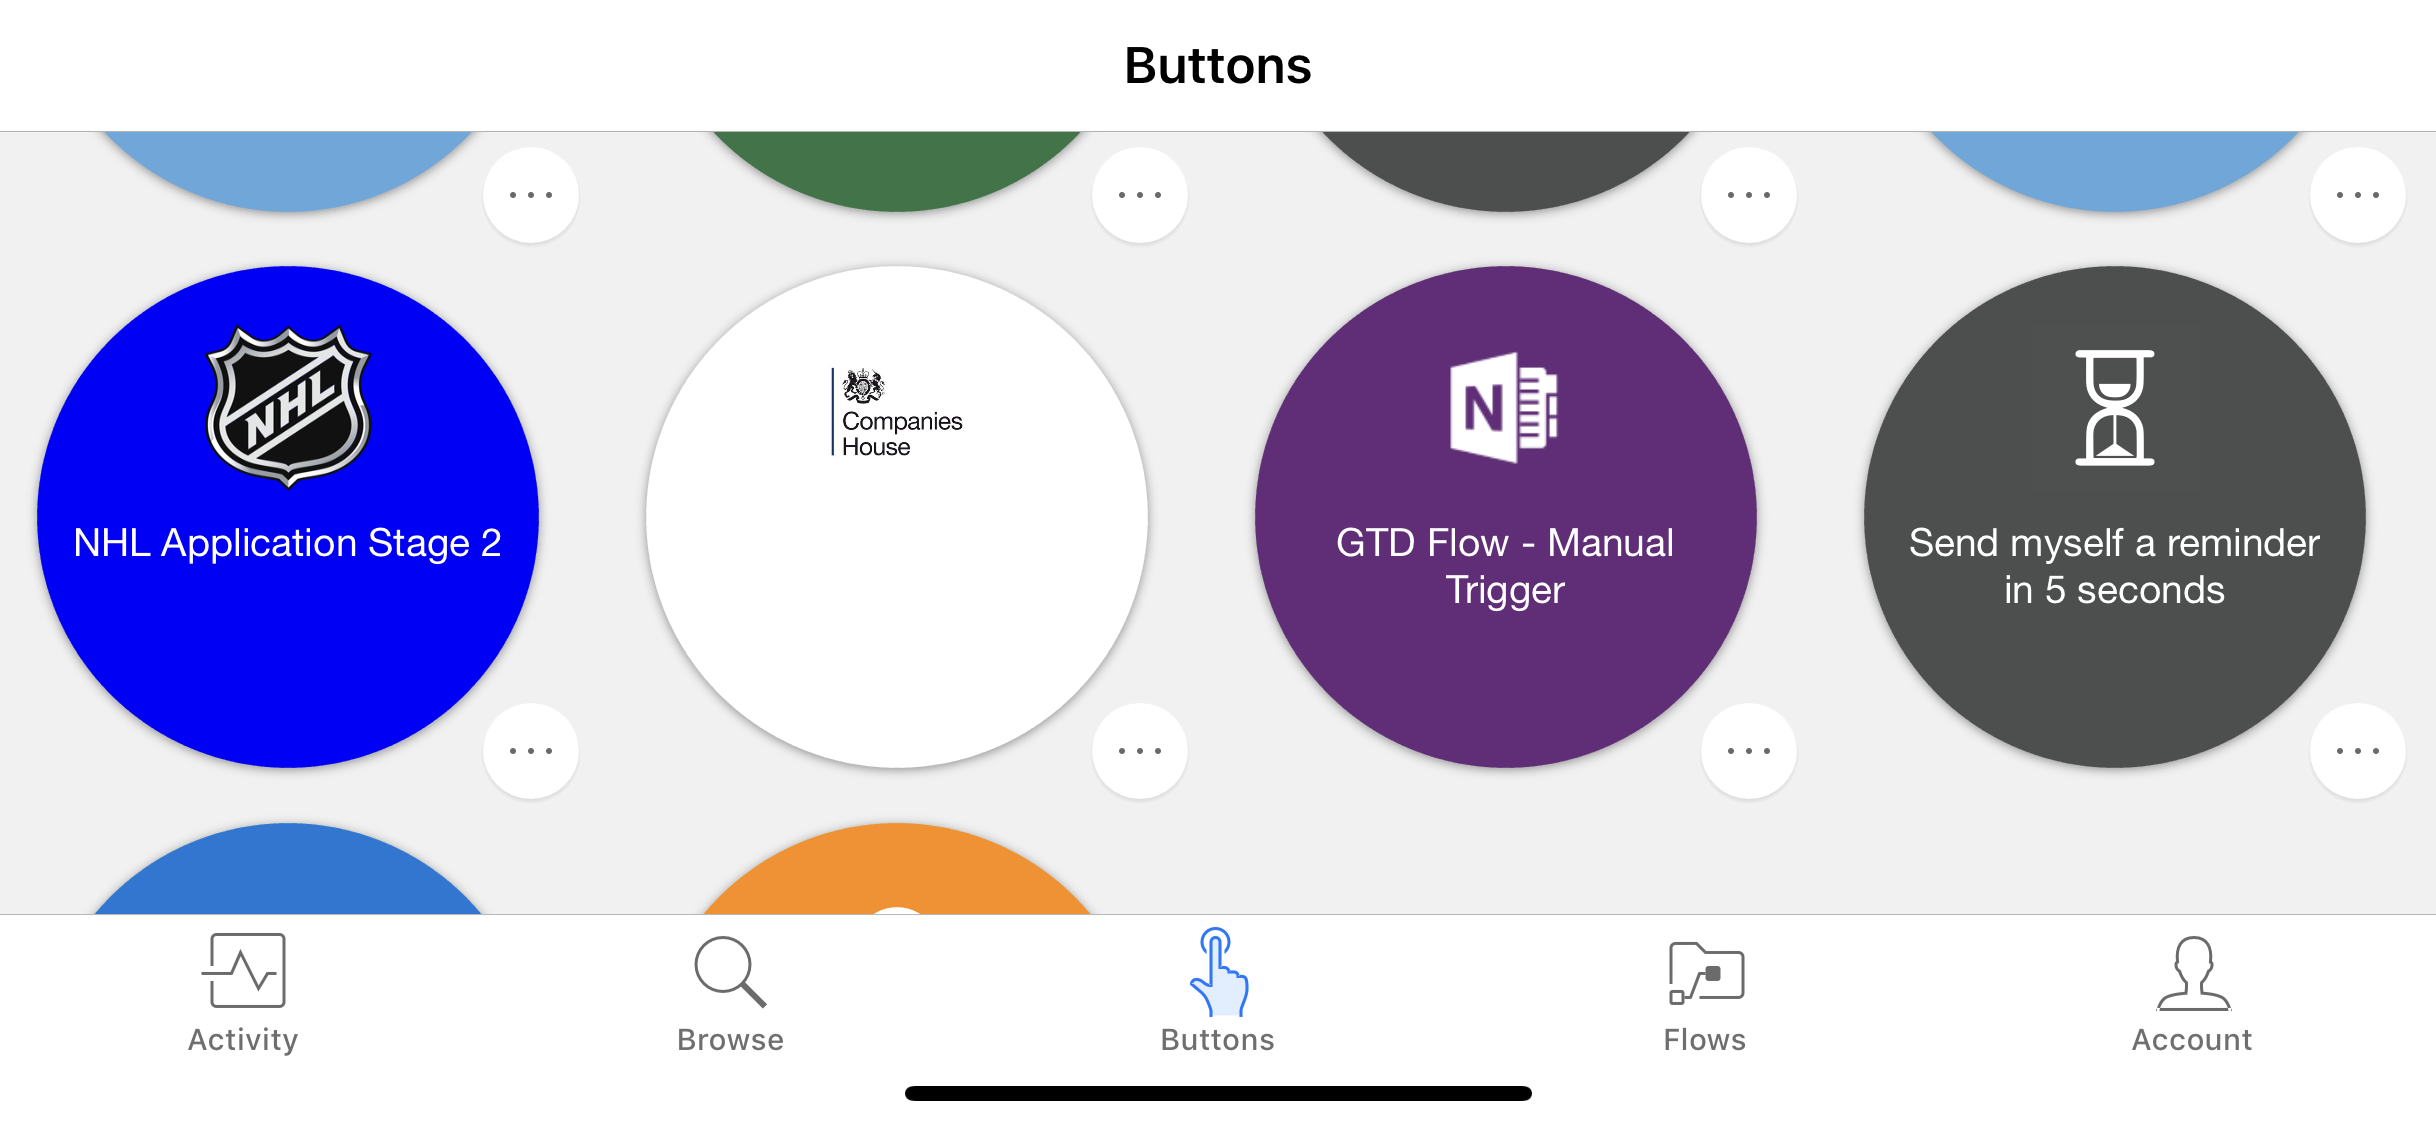
Manually Trigger a Flow is a trigger can be found in the ‘built-in’ trigger category under the ‘Flow Button for Mobile’ section. The trigger is used for manually triggering a Flow from a the Flow Mobile app. This places a circular button on the Flow app (shown below) that, when pressed, triggers the related flow.
Functionality
When first adding the ‘Manually Triggering a Flow’ trigger a.k.a. ‘Flow Button for Mobile’ trigger, to a flow you’re presented with an ‘Add an input’ button. This button, once clicked presents a list of user inputs that you can use within your Flow. This list and what they can be used for are described below:

Text
This takes a string (alphanumeric characters) input, such as a users name, NHL team, company identification abbreviation etc. This can be passed to a variable and handled throughout your flow.
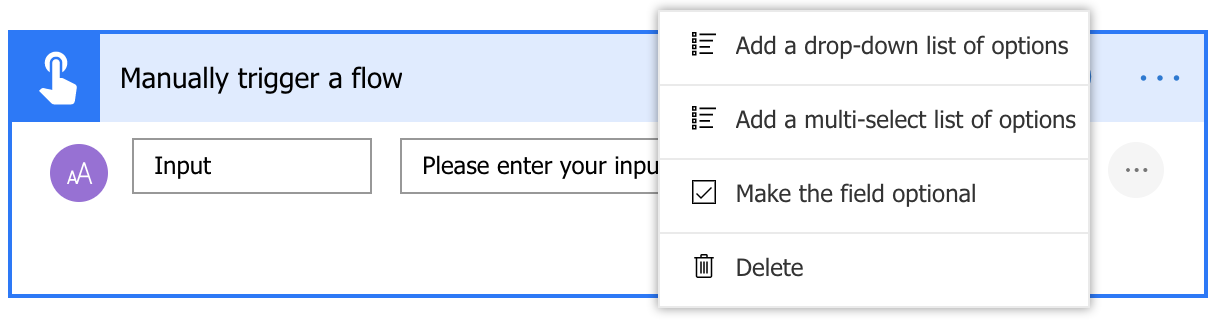
This is the only input type that allows you an additional options of creating a dropdown list of a multi-field dropdown selection. You can access this by selecting the three dots next to the field once it has been added.
Yes/No
The ‘Yes/No’ is effectively a boolean, a true/false input. This provides a simple toggle button and can be used, as an example, to decide if you wanted to also bring back additional information for a company. If the ‘Yes’ is passed through, you could use a condition to trigger the ‘IF YES’ section and pass additional information back to the user.
File
This allows a user to pass a file to the flow that’s about to be run, for example, imagine a scenario of a company that needed to store images for a car accident and have that passed to the relevant teams and systems of the company. You then create a flow with an approval process and Dynamics link, the user takes a picture and triggers the flow from their mobile device. During this trigger they select the photo and your flow now can pass this to the relevant teams and systems. This can also be done with signed document as an example.
This takes an email address input, similar to the string input but specifically for email addresses. This can be used to send emails with documents, information from other systems etc to an individual. You could use an example of a banking system here, asking a user to place their email in the flow you just triggered, it then pulls all of their information from their various systems and finally takes their email input and sends a mail notification to them.
Number
As with the email, the number is similar to the string input, except it does not take characters. The only string inputs you can use within number input is ‘-‘, ‘+’, ‘.’ and ‘e’. This would primarily be used for mathematical or phone related content. An example of this is that you would want to allow someone to enter their contact information, including their telephone number so that you could log their information onto your business system easily.
Date
The date input field simply takes a date in the ‘YEAR – MONTH – DAY’ format. This will have to be modified if your system was using any other date format before you passed this information. For example, this could be used to take a users birthday information or tag an entered date onto other information.
Make the Field Optional
Each of these inputs can be marked as ‘Make the Field Optional’. This allows you to offer the freedom to the user of not passing any information into the relevant input this has been placed on, for example, a user can ignore entering a number.
Example
As a user I want to use the Microsoft Flow mobile application to manually trigger my flow and it should request a persons name and email address so that I can store information on people that I have met at conferences. Once the name and email address are entered, the flow should send that information to my personal email address with ‘New Contact: <CONTACT NAME>’ so that I can organise my contacts when I’m home.
User Story
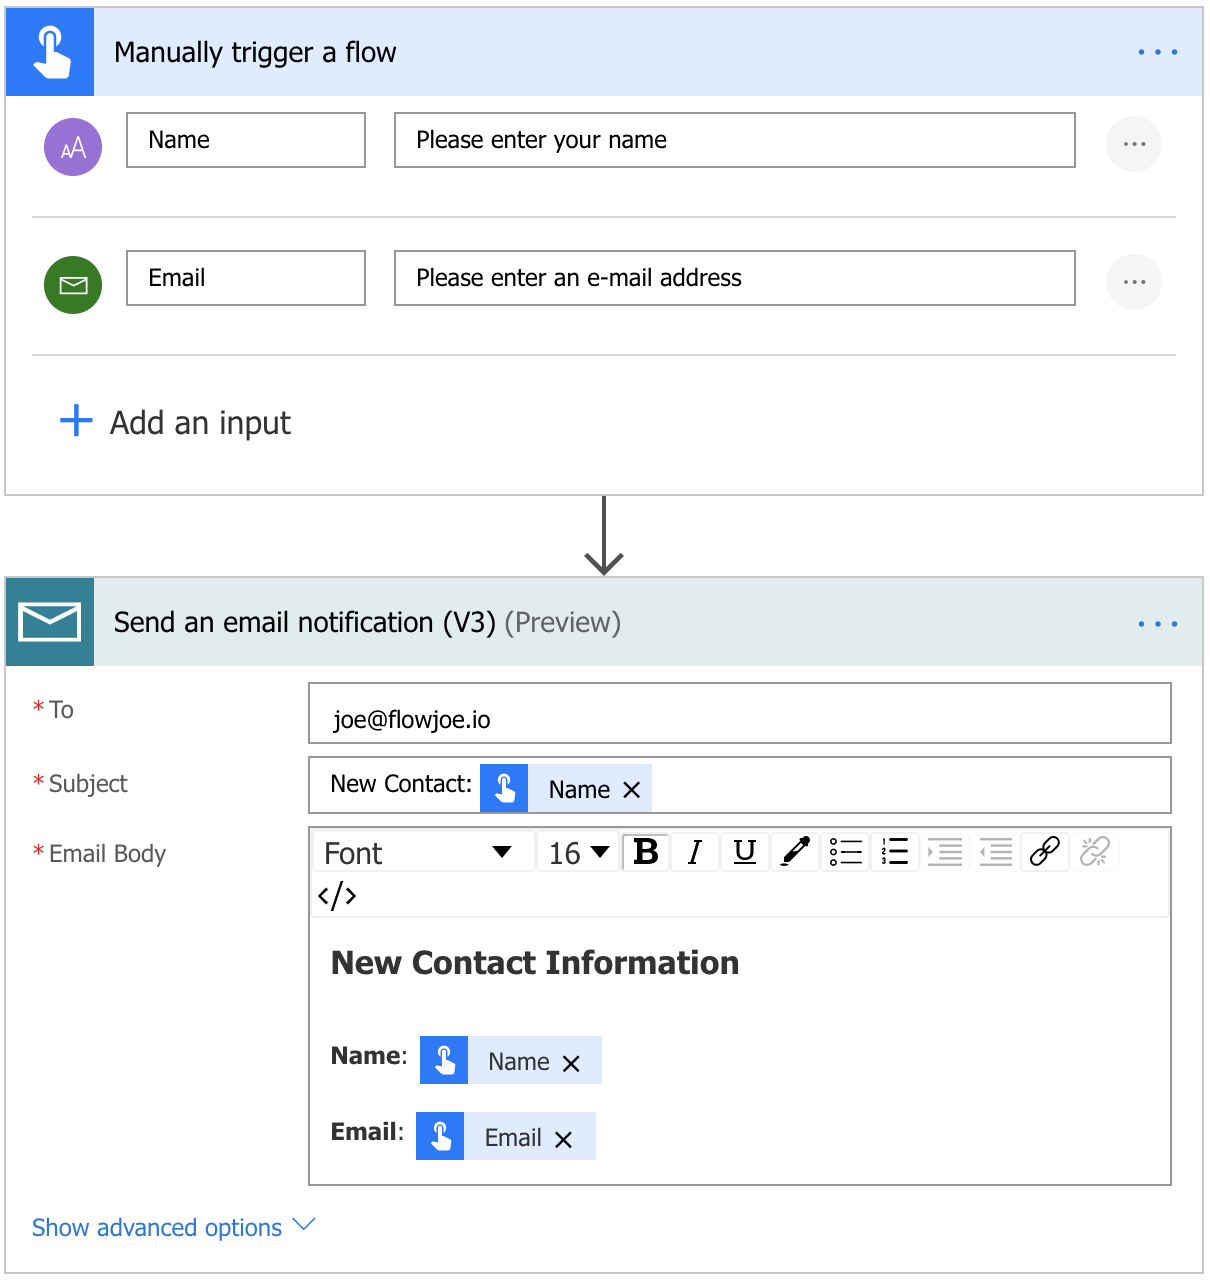
Firstly, we want to add a ‘Manually Trigger a Flow’ trigger to our flow. Then we want to add two inputs; Text and Email. Within the text field we want to change the title to ‘Name’ and the description displayed to the user to ‘Please enter your name’.
We then want to add a ‘Send an email notification (V3)’ action to allow us to send an email to ourselves. We enter our own email address in the ‘To’ field, then in the ‘Subject’ field we want to ensure the user knows it’s a new contact so we add ‘New Contact:’, however, we need to pass the name field from the manual trigger here so that the user knows who the new contact is in the subject title.
We then want to construct the body of the email. The first line of the body should simply state what the email is; New Contact Information. We then want to add ‘Name:’ and pass the name from the manual trigger through. We also want to do that same for ‘Email:’ and then pass the email taken from the manual trigger through.